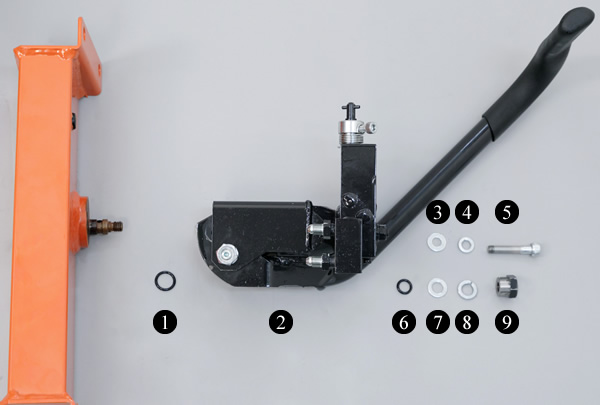


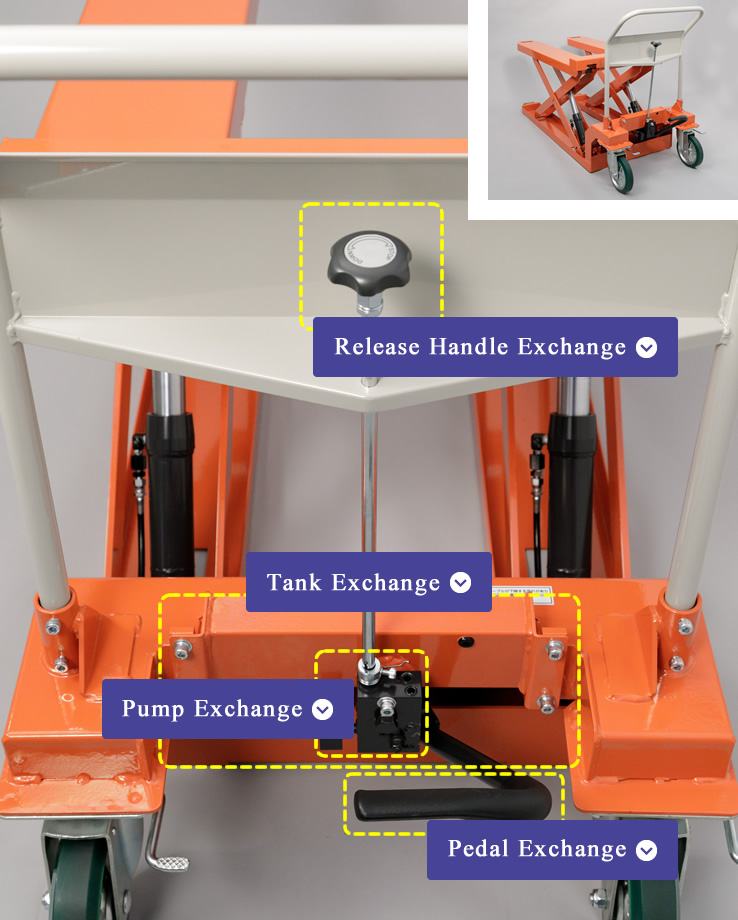
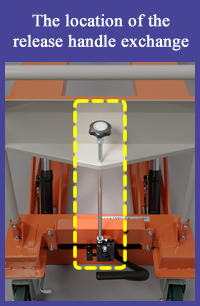
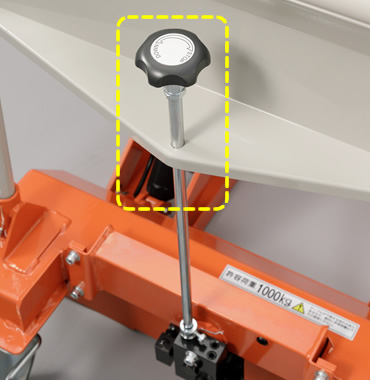
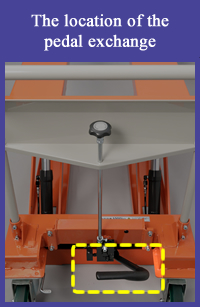
Parts Exchange
-
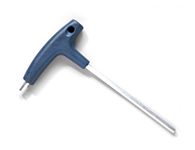
Required Tools
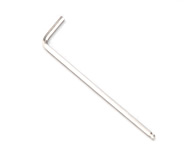
Allen wrench (3mm)
Instructions (outline)
- 1
Loosen the set screw.
- 2
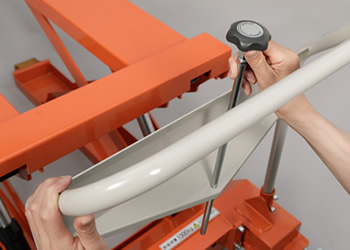
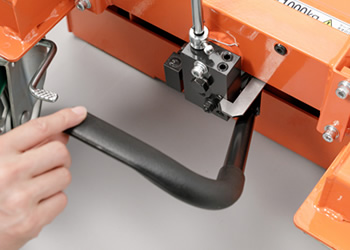
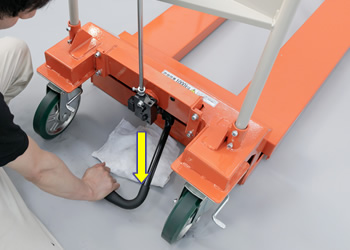
Slide down the upper stopper and pull out the release handle.
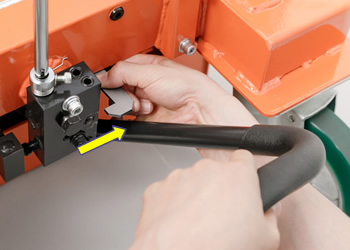
- 3
Insert a new release handle.
- 4
Attach the upper stopper and close the set screw of it.
Instructions (details)
-
1
Loosen the set screw.
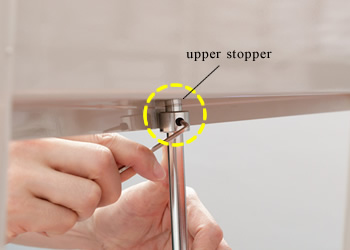
2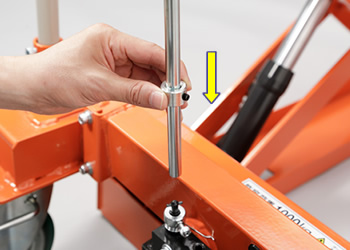
Slide down the upper stopper and pull out the release handle.
-
3
Insert a new release handle.
4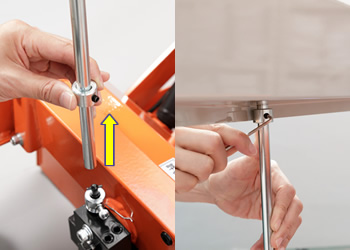
Attach the stopper from the bottom of the release handle and close the set screw of it at the upper side of the release handle.
-
Required Tools
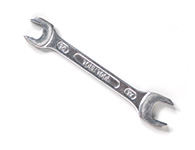
Spanner (17mm)
Ratchet wrenches (17mm)
(2 pieces)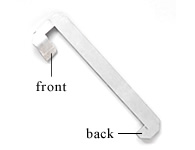
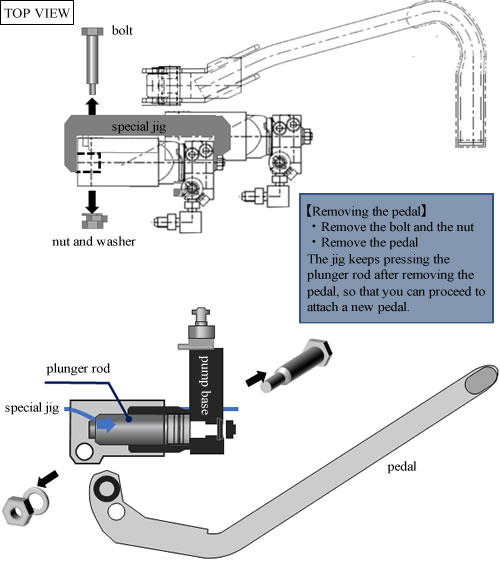
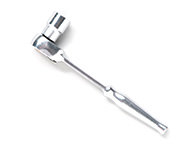
Special jig
Instructions (outline)
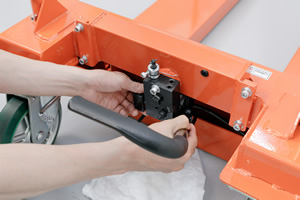
- 1
Lower the fork to the lowest position.
- 2
Set the special jig to make the pedal “free”.
- 3
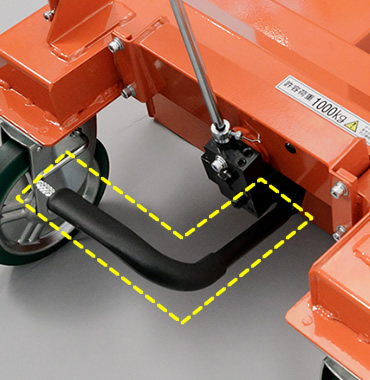
Remove the bolt and the nut, which fix the pedal.
- 4
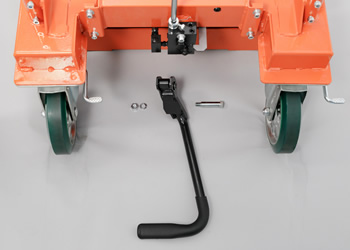
Remove the pedal.
- 5
Attach a new pedal.
- 6
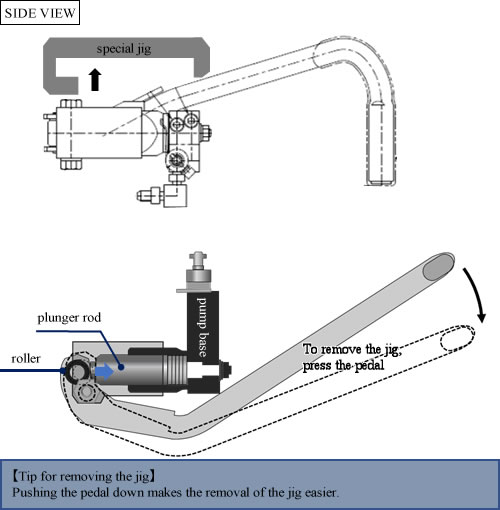
Finally remove the special jig.
Instructions (details)
-
1

Lower the fork to the lowest position.
-
2
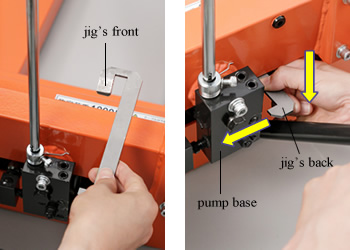
Hook the jig’s front on the plunger rod and then push the pedal down a little (about 1.2 inches) to hook the jig’s back on the pump base. As a result, the pedal becomes “free” .
-
In a “free” state of the pedal, the pedal is not pressed by the plunger rod because the jig is pressing the plunger rod.

-
3
Make sure that the pedal is free.
Then remove the hexagon head bolt with the 2 ratchet wrenches.
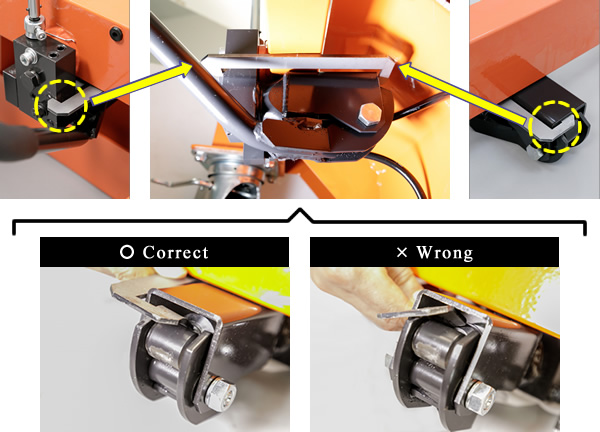
NOTE: Be careful not to move (slide) the jig while exchanging (removing and attaching) the pedal. -
4
Remove the pedal. Be careful not to misplace the hexagon head bolt, the nut, and the washer.
-
5

Attach a new pedal.
-
6
Finally remove the special jig.
-
Required Tools
-
Allen wrench (3mm)
Allen wrench (6mm)
Long nose pliers
-
Spanner (14mm)
(2 pieces)
Instructions (outline)

- 1
Lower the fork to the lowest position.
- 2
Remove the release handle.
- 3
Release air from the tank to reduce the internal pressure inside the tank.
- 4
Remove the 2 high pressure hoses.
- 5
Remove the tank.
- 6
Attach a new tank.
- 7
Attach the 2 high pressure hoses.
- 8
Attach the release handle.
- 9
Idle pumping.
Instructions (details)
-
1

Lower the fork to the lowest position.
-
2
Remove the release handle.
-
3
Release air from the tank by using the long nose pliers until the air ceases to hiss.
-
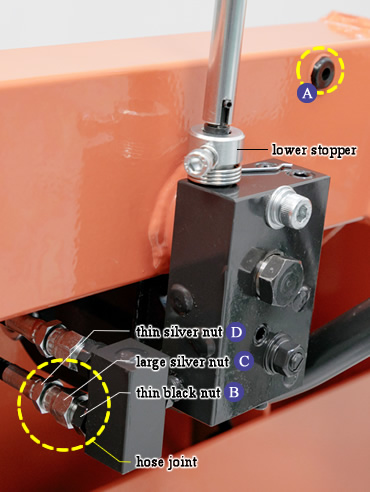
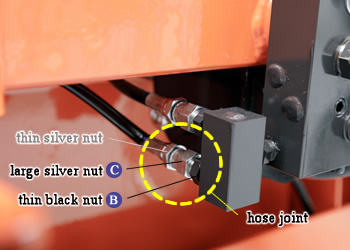
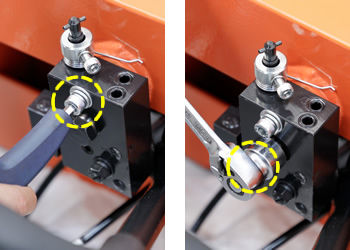
4
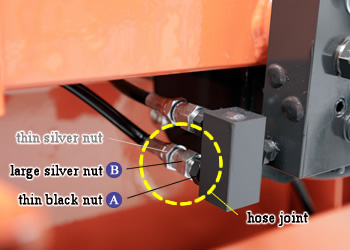
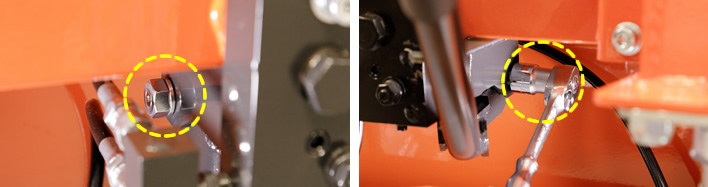
After releasing the air inside the tank, loosen the large silver nut B at the mouth of the hose while holding the thin black nut A by using the spanners and then remove the hose.
Remove the remaining hose in the same way. -
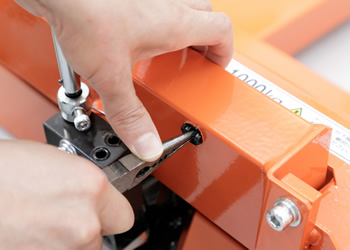
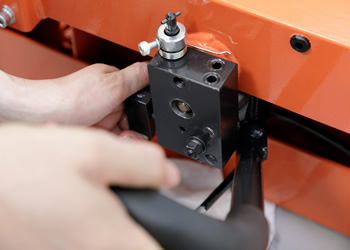
5
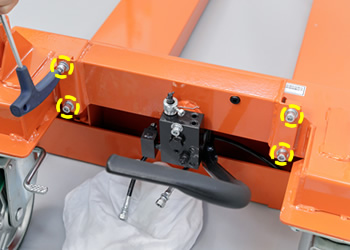
Loosen and remove the 4 cap bolts carefully to remove the tank.
-
6

Attach a new tank.
-
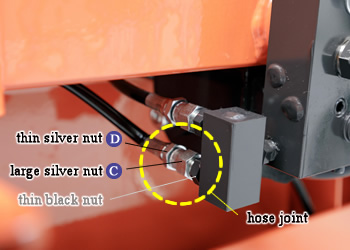
7

Close the large silver nut A at the mouth of the hose while holding the thin silver nut B by using the 2 spanners to attach the high pressure hose. Attach the remaining hose in the same way.
-
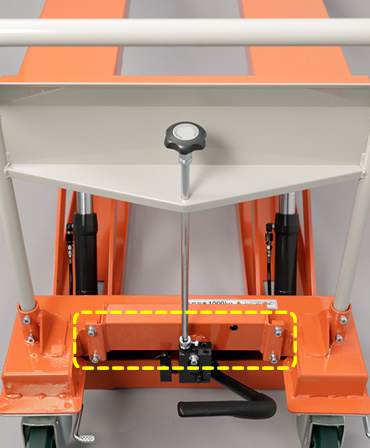
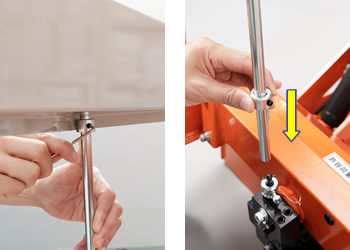
8
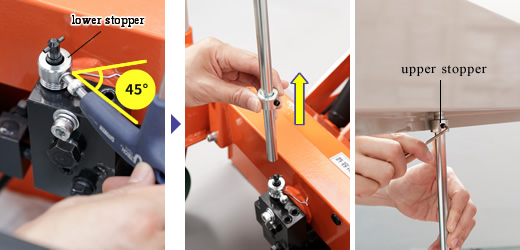
Create tension on the spring of the lower stopper by turning the stopper anti-clockwise so that the angle between the cap bolt and the spring forms less than 45-degree, and then close the cap bolt.
Attach the release handle. -
9
While keeping the release handle in “down” position with your left hand, pedal (press the pedal) about 10 times quickly with your right hand to fill the pump with oil (Idle pumping).
-
Required Tools
-
Spanner (14mm)
(2 pieces) -
Ratchet wrench (19mm)
(2 pieces) -
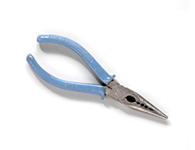
Long nose pliers
-
Allen wrench (5mm)
-
Allen wrench (6mm)
-
Allen wrench (3mm)
Instructions (outline)
- 1
Lower the fork to the lowest position.
- 2
Remove the release handle.
- 3
A Release air from the tank.
to reduce the internal pressure inside the tank. - 4
B C Remove the 2 high pressure hoses.
- 5
Remove the pump (pump unit).
- 6
Attach a new pump (pump unit).
- 7
C D Attach the 2 high pressure hoses.
- 8
Attach the release handle.
- 9
Idle pumping.
Instructions (details)
-
1
Lower the fork to the lowest position.
-
2

Remove the release handle.
-
3

Release air from the tank by using the long nose pliers A until the air ceases to hiss.
-
4
After releasing the air inside the tank, loosen the large silver nut C at the mouth of the hose while holding the thin black nut B by using the spanners and then remove the hose.
Remove the remaining hose in the same way. -
5
Remove the cap nut and the cap bolt.
-
6
Replace the pump with a new pump.
Insert and close the cap bolt and the cap nut with your hand and adjust the pump base upright with your hands.
After that, close the nut and the bolt firmly with the rachet wrench and the Allen wrench. -
7
Close the large silver nut C at the mouth of the hose while holding the thin silver nut D by using the 2 spanners to attach the high pressure hose. Attach the remaining hose in the same way.
-
8

Create tension on the spring of the lower stopper by turning the stopper anti-clockwise so that the angle between the cap bolt and the spring forms less than 45-degree, and then close the cap bolt.
Attach the release handle. -
9

While keeping the release handle in “down” position with your left hand, pedal (press the pedal) about ten times quickly with your right hand to fill the pump with oil (Idle pumping).